Instruction WMS
Instructions to access SoilGrids layers with web services
SoilGrids layers are provided as Web Map Service (WMS) layers and Web Coverage Service (WCS), which load dynamically in a GIS software. The page https://maps.isric.org provides an overview of the SoilGrids layers, the layer names and the WMS/WCS link.
Below you will find the instructions on how to use the services server to access and display SoilGrids in ArcMap and QGIS with WMS.
Loading SoilGrids layers to ArcMap/ArcGIS through WMS
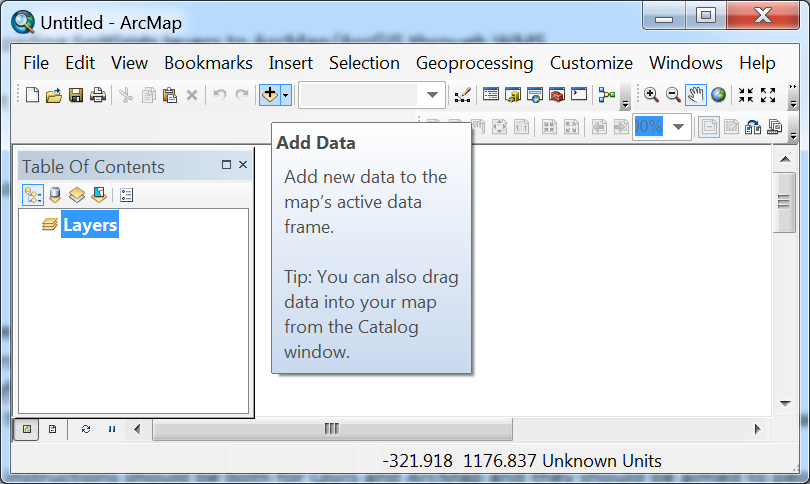
Step 1: Start ArcMap and click icon ’+’ or Add Data
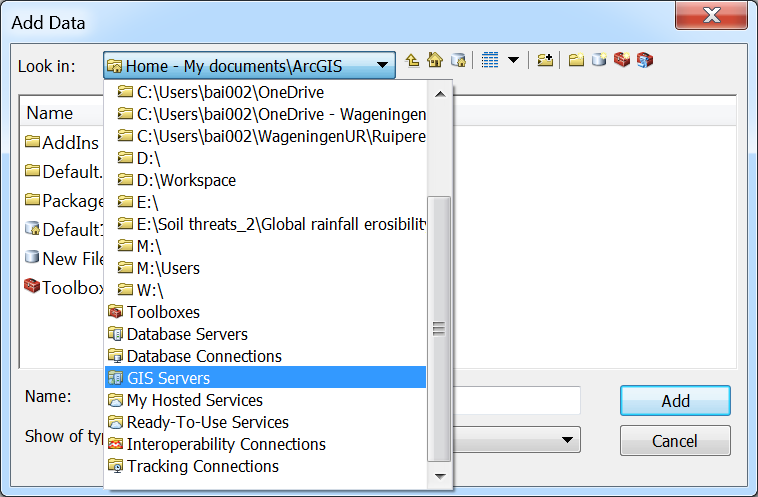
Step 2: Select GIS Servers
In the Add Data window, click the box next to Look in: and scroll down to select GIS Servers
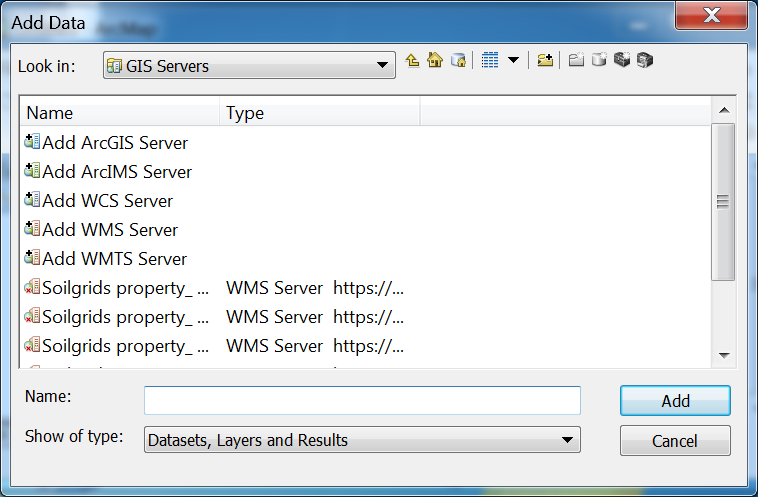
Step 3: Add WMS Server
Double click GIS Servers, in the GIS Servers window and double click Add WMS Server. The Add WMS Server window opens.
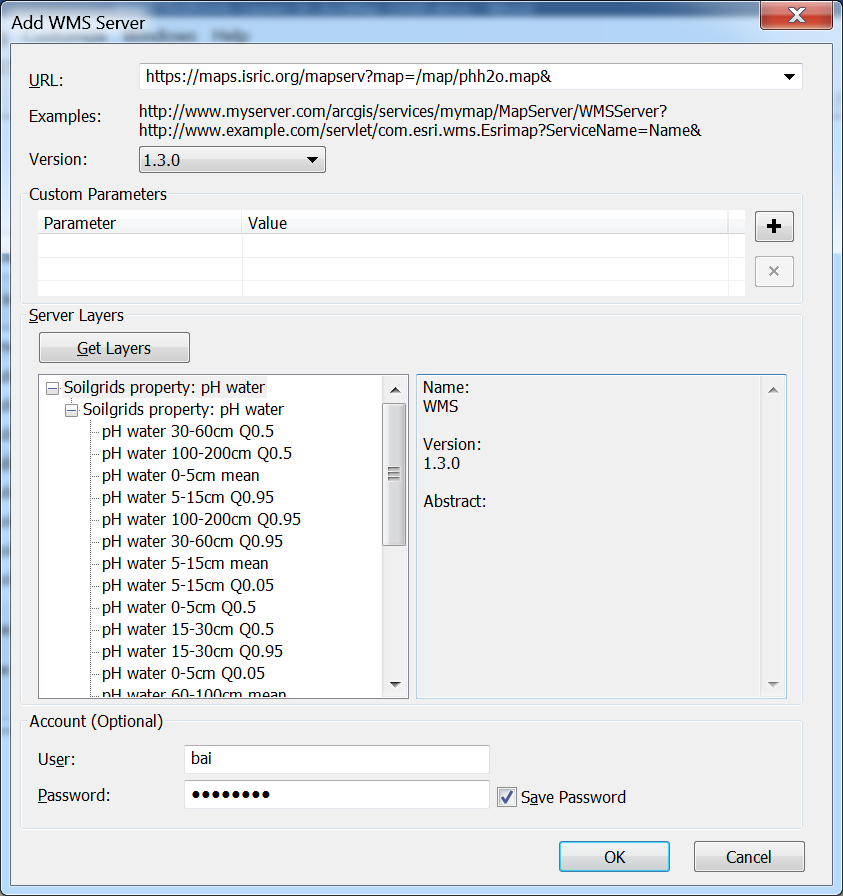
Step 4: connect the WMS Server to the SoilGrids WMS
In the Add WMS Server window, copy the URL of SoilGrids Layer you wish to add to your GIS and paste the URL to column URL. For instance the WMS link for the layer pH in water (phh20) is: https://maps.isric.org/mapserv?map=/map/phh2o.map . Choose a Version e.g. 1.3.0, then click Get Layers. Click OK.
Step 5: add SoilGrids layers to ArcMap/ArcGIS project
In the Add Data window you now see that this WMS is added to the GIS Servers folder. In the example of the pH-H2O layers the WMS appears as Soilgrids property_pH water on maps.isric.org.
Click Add and then once more Add. The SoilGrids layers are loaded to Table of Contents within ArcMap/ArcGIS.
Alternatively, browse to the added WMS layer in the Catalog, select the layer and drag the layer to the table of contents.
Choose or tick a soil property layer for the depth (0-5, 5-15, 15-30, 30-60, 60-100, 100-200cm) and prediction (Q0.05, mean, Q0.5, Q0.95) you wish to evaluate.
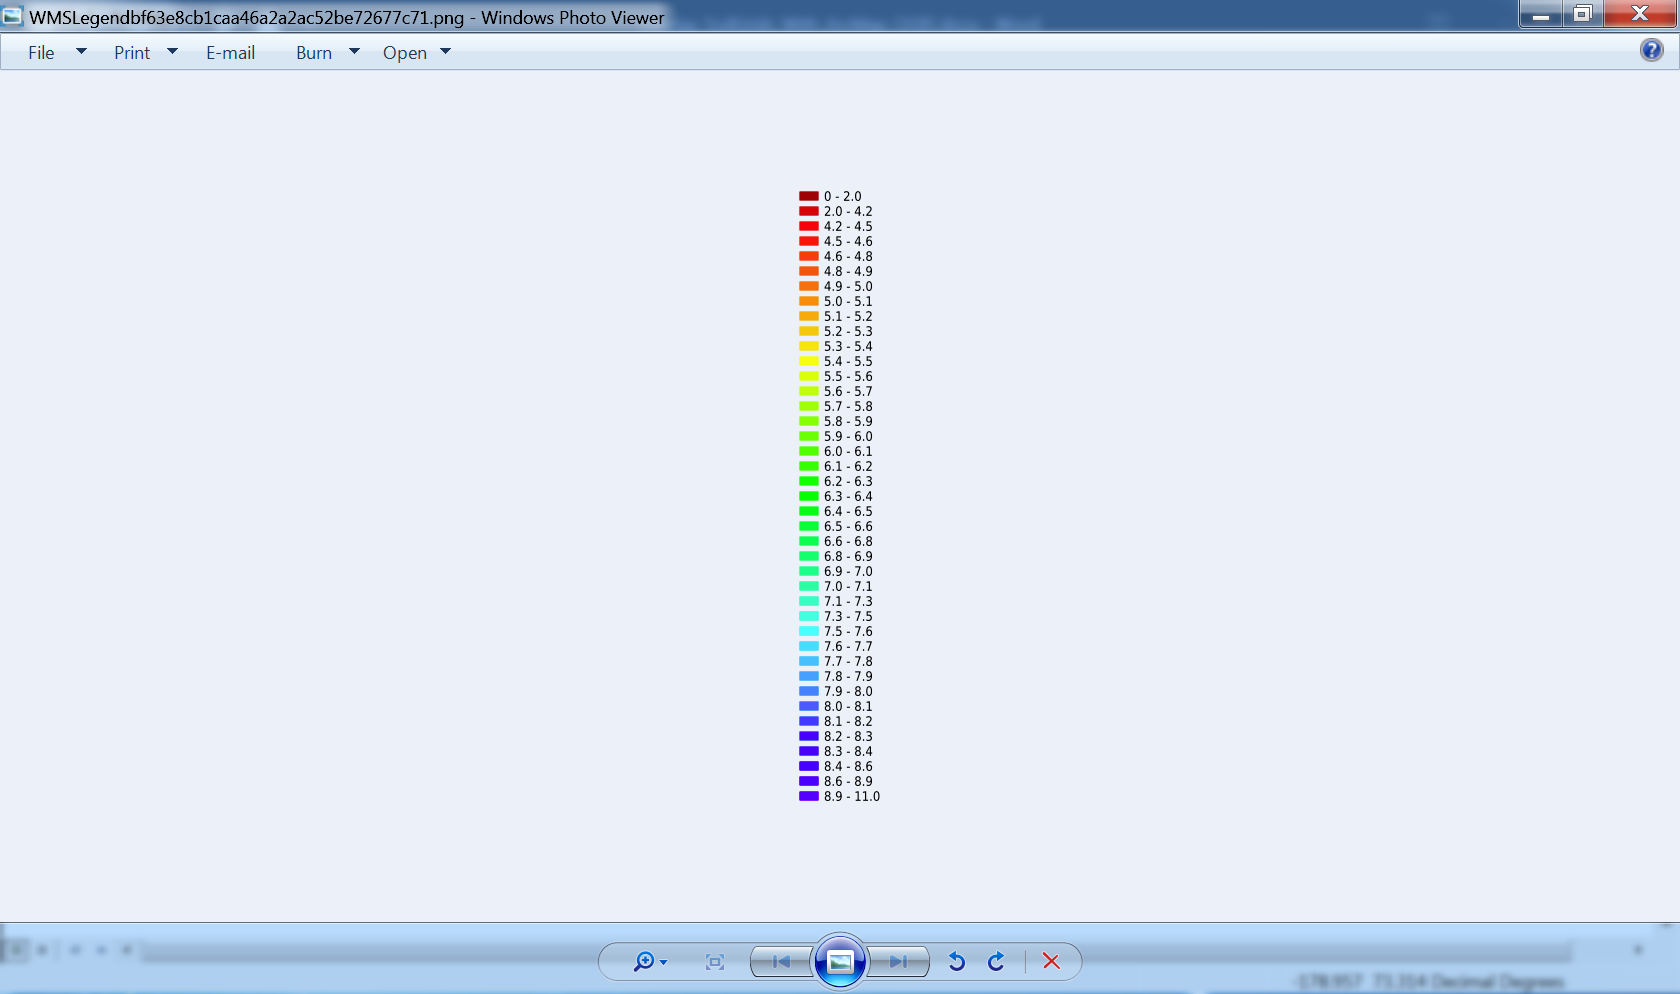
Step 6: accessing the map legend
To access the legend. double click a layer. The Layer Properties window opens. Select Styles.

Step 6: accessing the map legend
To access the legend. double click a layer. The Layer Properties window opens. Select Styles.
Loading SoilGrids layers to QGIS through WMS
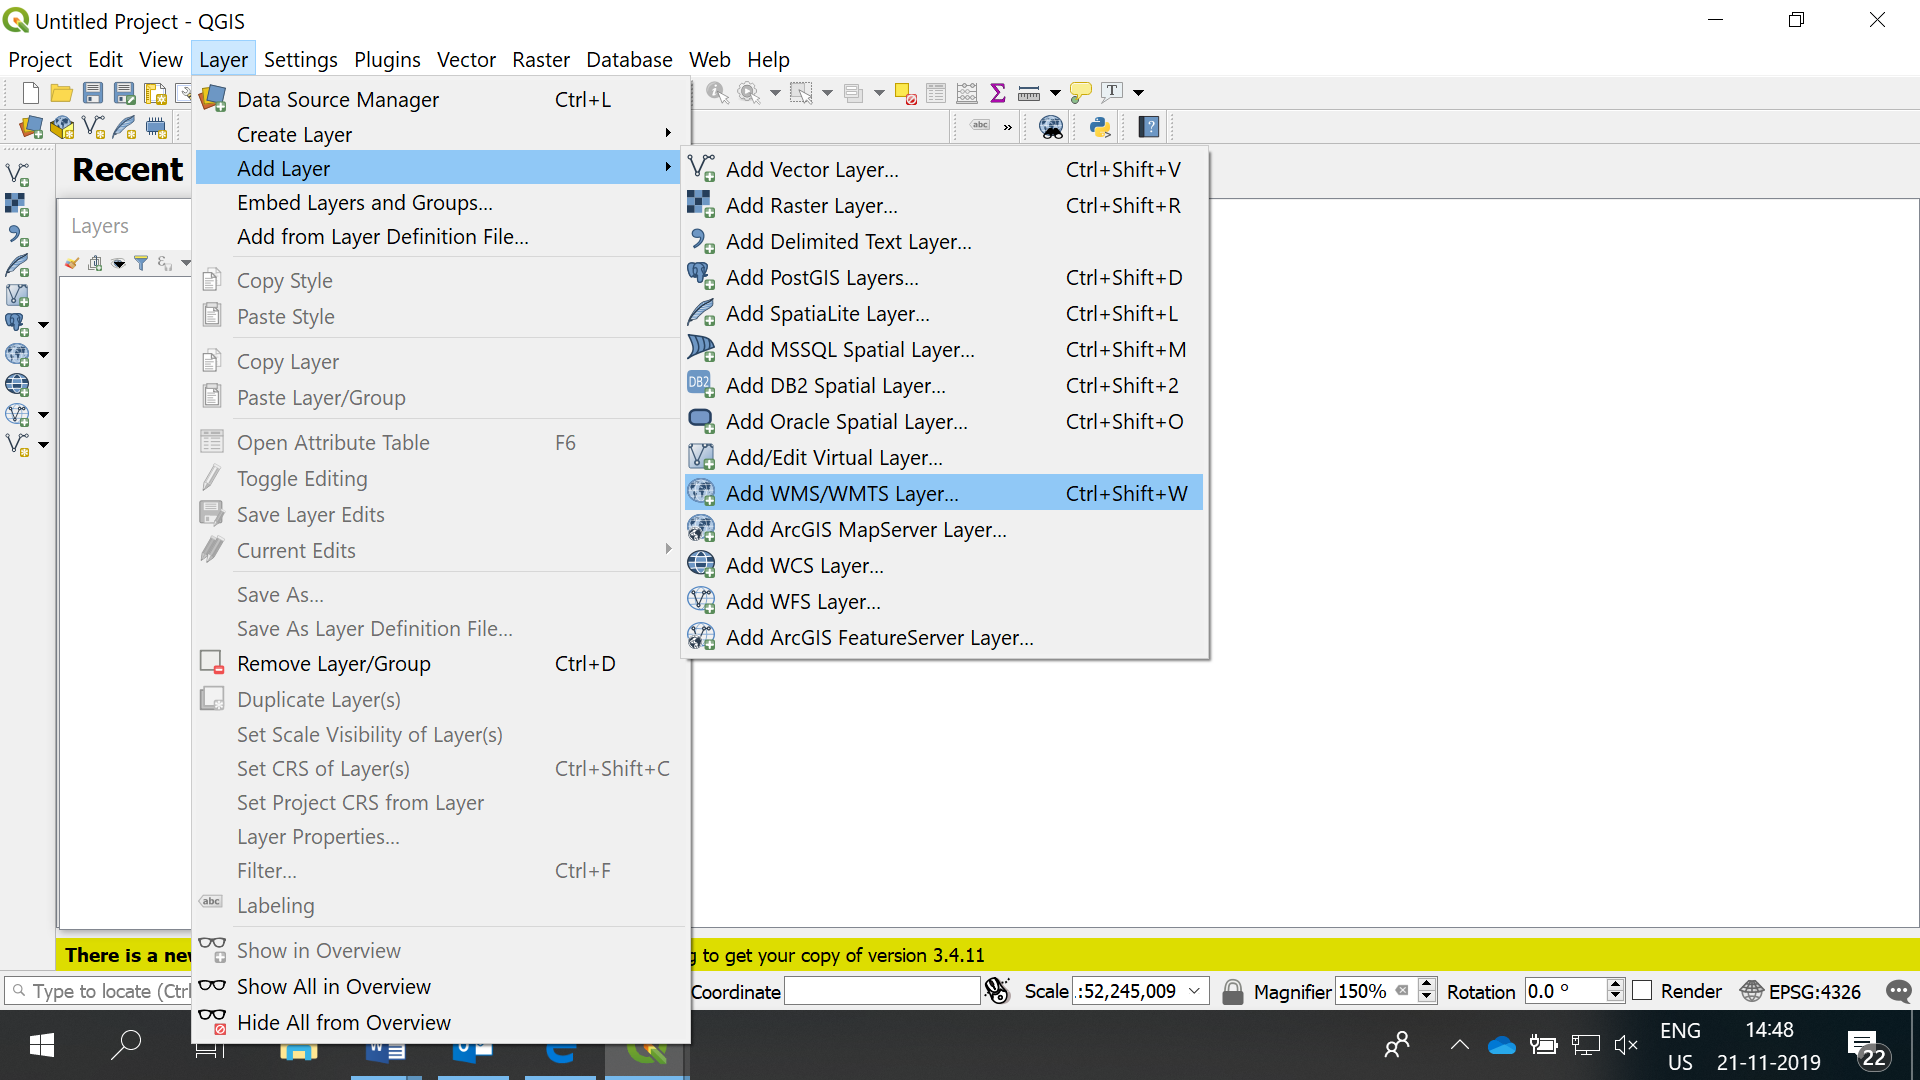
Step 1: Adding WMS in QGIS
Start QGIS, in QGIS go to the Layer tab and navigate to the Add WMS/WMTS option. Also you can locate the icon to directly access to this option in the left panel of your QGIS.
Step 2: creating a New WMS/WMTS Connection
In the Data Source ׀WMS/WMTS window, click the New button.

The following window will appear:
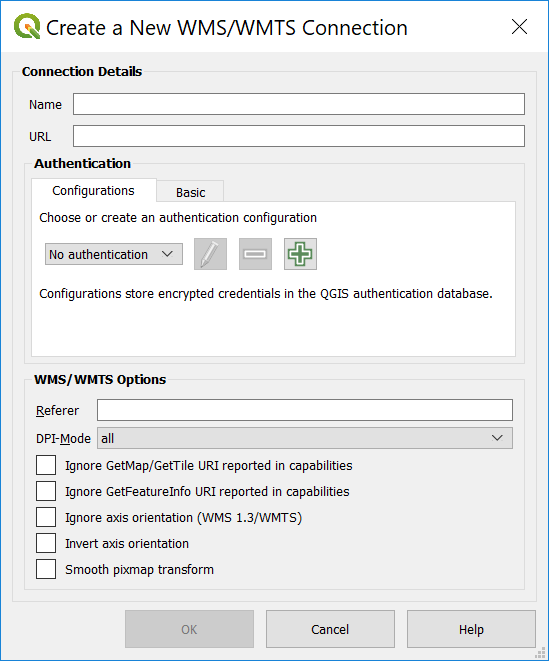
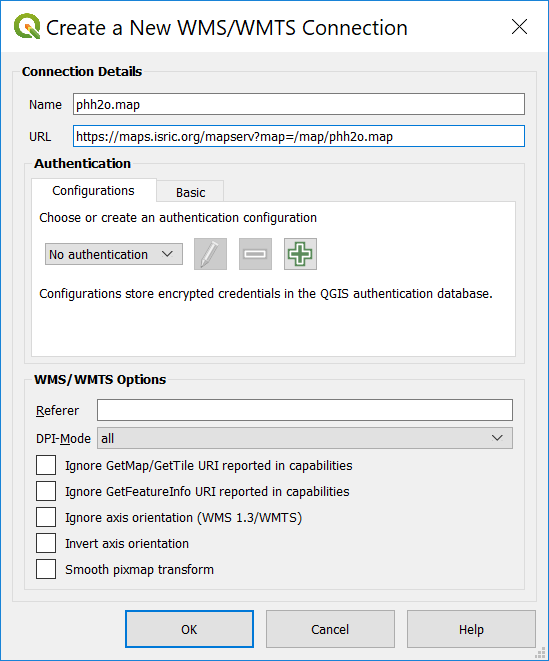
Fill in a Name and copy/paste a URL of a SoilGrids WMS in the URL box. For instance, fill in phh2o.map in the Name box, and copy and paste: https://maps.isric.org/mapserv?map=/map/phh2o.map
The WMS URLs can be obtained from https://maps.isric.org
Click OK. The WMS is added to the Data Source ׀WMS/WMTS window.
Step 3: Connect the URL of SoilGrids to QGIS
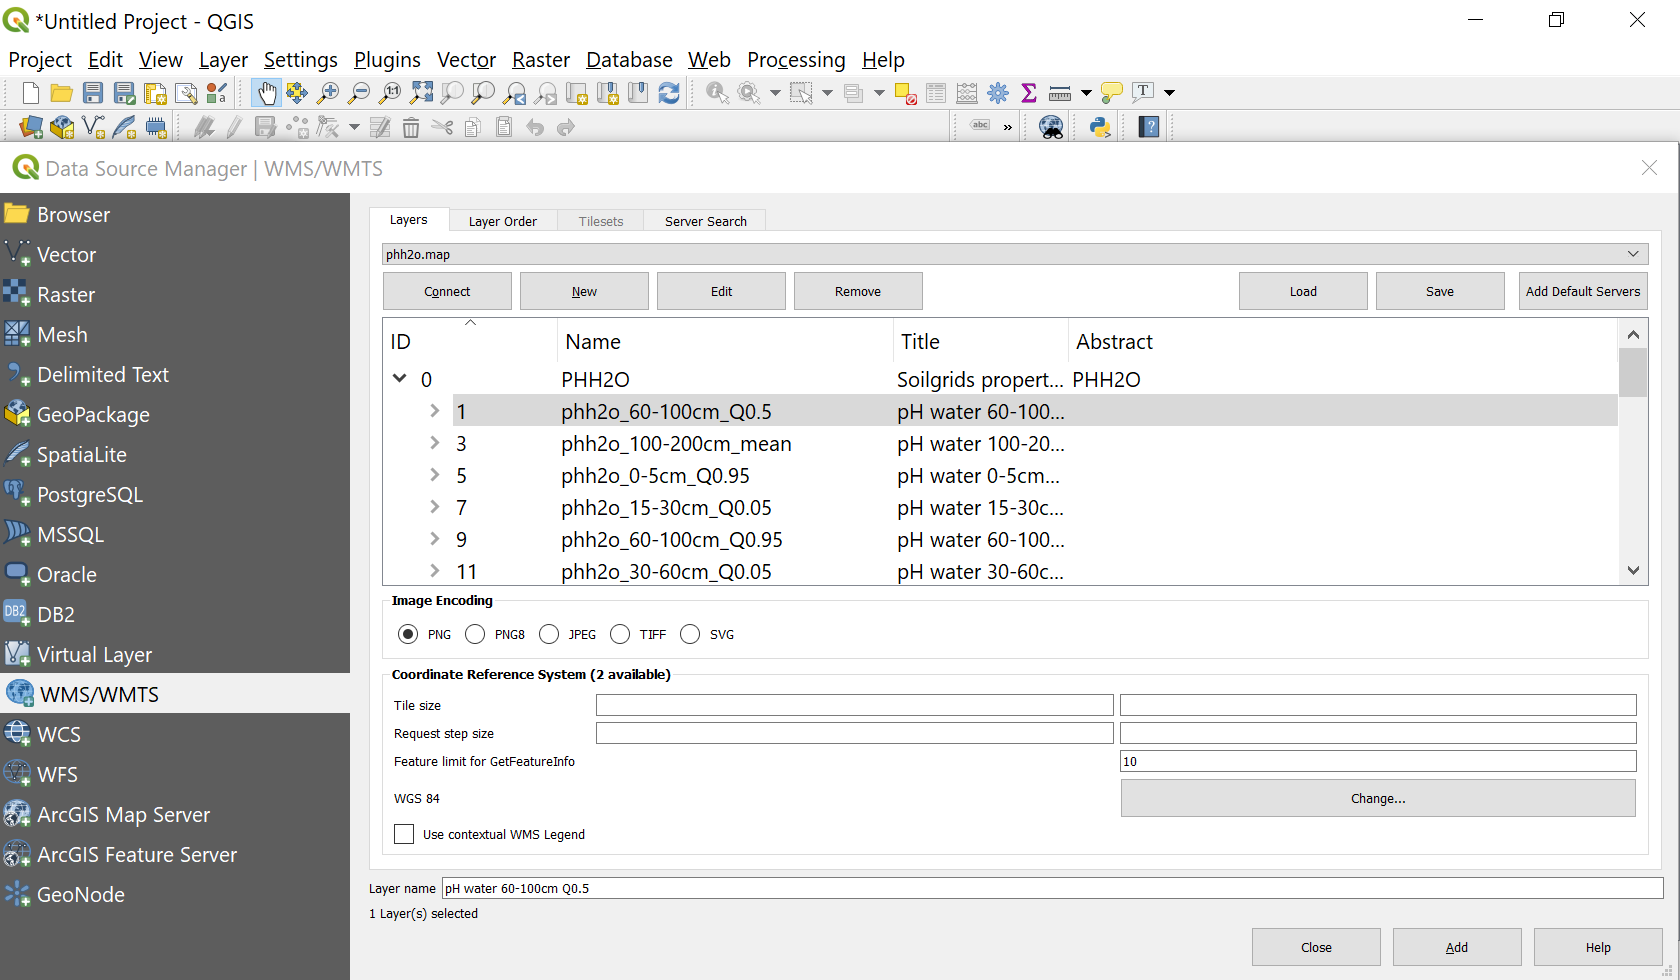
Click Connect (ignore a possible SSL warning). Provide your credentials if requested. The layers now appear in the Data Source ׀WMS/WMTS window.

Step 4: Connect the URL of SoilGrids to QGIS
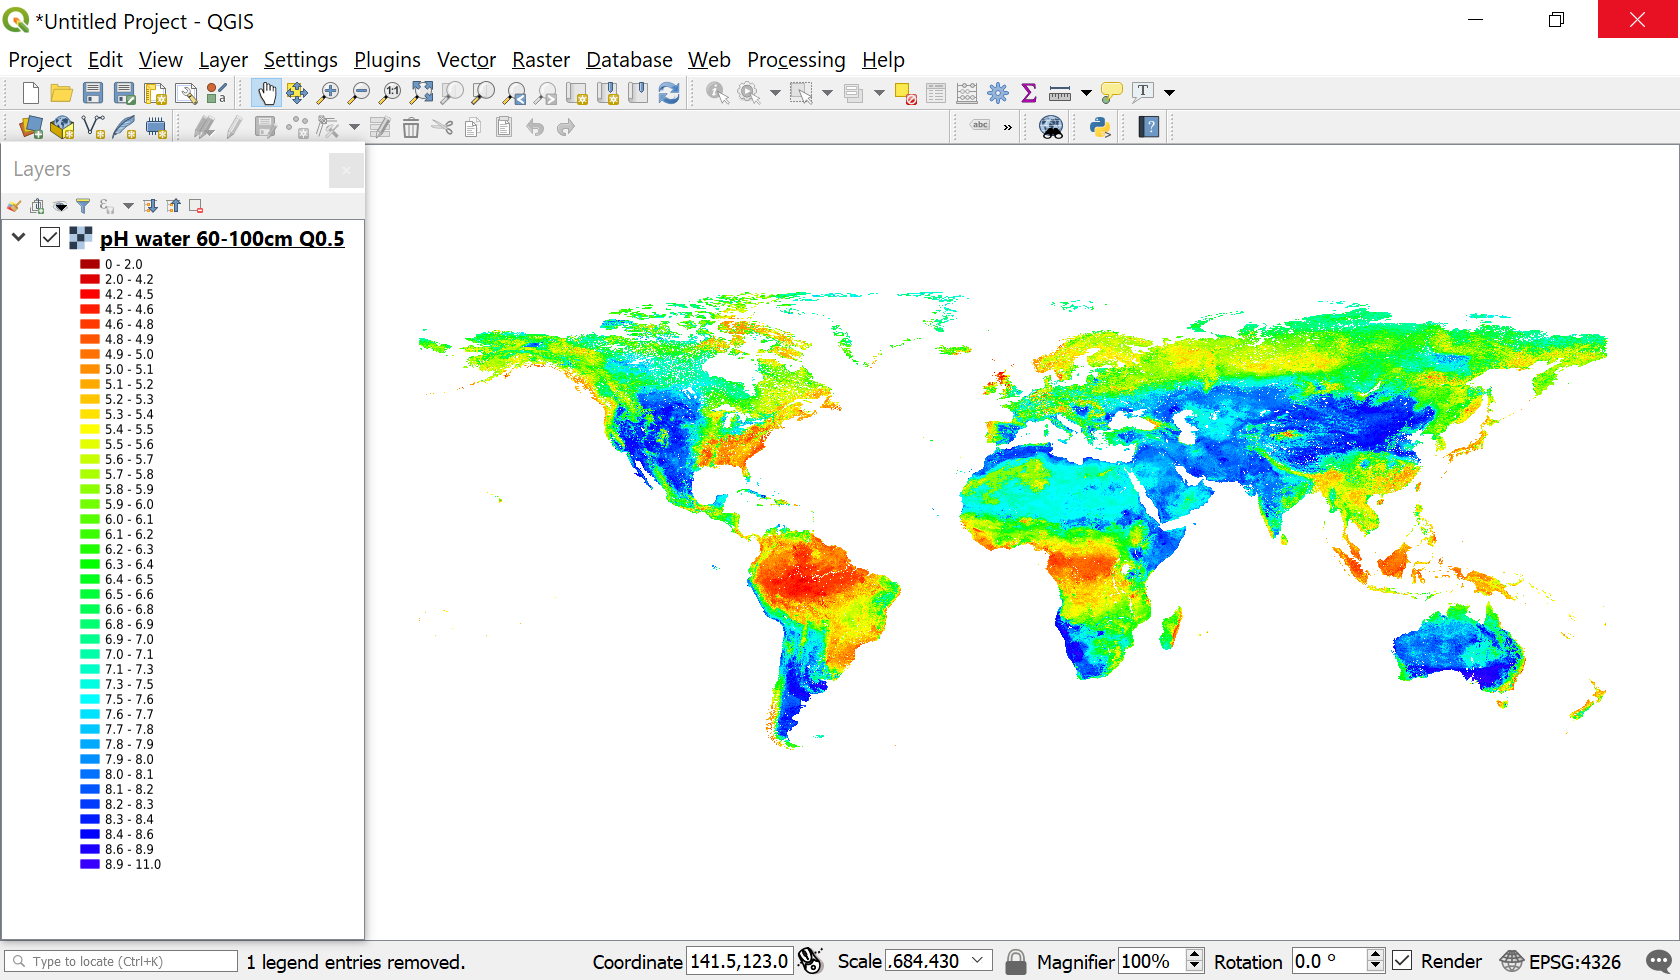
Select the layer you wish to add and then click Add. Note that layers can only be added one at a time.
Acknowledgements
Zhanguo Bai and Bas Kempen wrote this tutorial.